6 Steps a Roofer Takes to Help You Avoid Avalanches

By DaVinci Roofscapes.
Learn how a snow guard is installed and the way it helps prevent mini avalanches from sliding off your roof.
Snow guards are strategically placed to help break down snow so your roof doesn’t create a mini avalanche around your home when it snows. If you have a composite roof, it is critical to get a snow retention system to create a break between snow that builds up on your roof’s surface. Otherwise the melting snow will slide off in chunks around your home.
Here’s a quick explanation of how snow guards (which are one form of a snow retention system) can help a DaVinci Roofscapes roof: they act as “breaking barriers” as snow melts and slides off the composite roof. Rather than experiencing an avalanche of snow that comes down all at one time and can harm landscaping and block doorways below, snow guards help regulate the release of snow from synthetic roof tiles.
Leave it to the professionals
Because snow guards are installed on composite roofing shingles around the perimeter of the roof (usually on the lower portion), this is a project best left to professional roofers.
According to Lars Walberg, president of Rocky Mountain Snow Guards, “For a retrofit application you need to apply sealant to the top of the DaVinci shingle where the snow guard will be placed.
“The snow guard is situated in a recommended pattern, such that 2″ of strap is showing between the face of the snow guard and the butt end of the shingle above. Then (2) 2.5″ self-tapping fasteners with gaskets are driven through the snow guard strap approximately 1/2″ below the butt end of the shingle above, through the shingle and substrate until tight.”
Walberg goes on to say that, “The appropriate snow guard to use in this application is the ST9 by SnowTrapper which is available in copper or dark bronze coated aluminum.”
According to Walberg, roughly two-thirds of the snow guards his company sells are for retrofit applications. He recommends the SnowTrapper ST11 for all DaVinci slate profiles, single-width and multi-width shake up to 9/12, and Bellaforté Shake up to 7/12. For Bellaforté Shake over 7/12 and slate profiles over 9/12, he recommends the RockyGuard RG10.
There are certainly other snow guards by other manufacturers that would also work well with composite slate and simulated shake roofing. The experts at DaVinci Roofscapes don’t recommend or endorse any products that the company doesn’t manufacture, but the team does support Walberg’s installation methods.
Installing snow guards
Snow guards can be retrofitted fairly easily by professional roofers to composite slate or shake roofing products,. The steps a professional roofer takes to evaluate and install snow guards are outlined as follows by Walberg:
Step 1 – Contact the snow guard manufacturer to work with them to gain a recommended layout and pattern for the specific roofing project you’re working on. This will be based on several factors including the pitch of the roof, the home’s geographic location and specific areas of the property that the homeowner wishes to protect from snow avalanches.
Step 2 – Follow the layout pattern closely when retrofitting the snow guards.
Step 3 – When installing the snow guards in a DaVinci shake or slate roof, there should be at least six inches of spacing between the snow guard pad face itself and the butt of the course above.
Step 4 – Mark the location of each snow guard and then apply an appropriate sealant, like one part urethane sealant or thermoplastic sealant. It’s important not to “bend back” the DaVinci roofing tiles during the snow guard application.
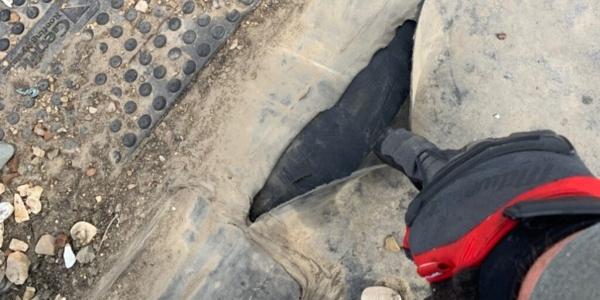
Step 5 – Slide the snow guard up and under the course above and press it into place over the sealant. The most important things are to place the snow guards so there is a significant space between the butt end of the shingle above and the pad face so the snow guard can “grab” the snow. It’s recommended that the strap is showing equal to three times the thickness of the butt end of the shingles on pitches up to 6/12, and six times the thickness on pitches over 6/12. It’s also important to mark the placement so the pattern is uniform.
Step 6 – Attach the snow guard with two fasteners into the strap in an offset pattern approximately 1.5 inches above the pad face, spaced one inch apart. Rocky Mountain Snow Guards recommends the Woodbinder Eclipse 10 x 2.5 screws for this step. These screws are self-tapping, self-sealing and have coated heads to match the color of the snow guard.
Have a question? AskARoofer.
Find your local roofing contractor in the RoofersCoffeeShop® Contractor Directory.
Original article source: DaVinci Roofscapes


Comments
Leave a Reply
Have an account? Login to leave a comment!
Sign In