Q & A - Adding Life to a Cedar Shake Roof
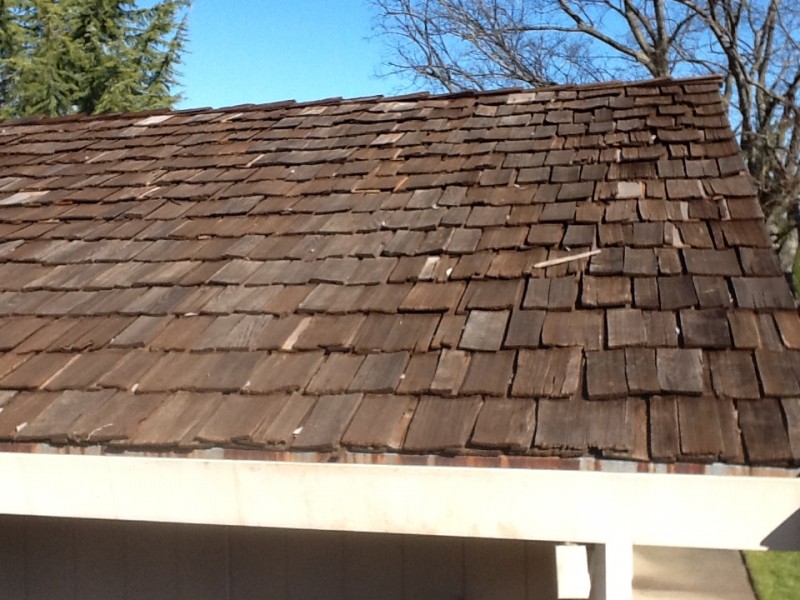
How can I make my cedar shake roof last longer?
Monday evening I received this question from an old friend who lives in the Portland area. Rod asked, "I will be replacing my old shake roof this year. My roofer suggested going back with cedar shakes. Can you give me any information making it a better roof?"
Three tips for a better shake roof
1 - Since you replaced the shake roof with the same, there are a few tips I think you should consider. Cedar shakes come in two different thicknesses, mediums and heavies. The mediums are about 5/8 to 3/4 inch thick at the butt or bottom of the shake. Heavies are 3/4 inch or thicker. I would advise buying the heavies because of the longer life cycle. The thicker heavy shakes last about five more years than the thinner ones and are worth the cost difference.
2 - The next tip I would highly recommend is, using 22 inches felt vs 18 inches. For years the felt used with the shakes has been 18 inch wide. The cedar shake system has a 10-inch exposure per course, so we roll the felt out in 10 inches courses or rows, leaving an 8-inch head-lap under the next course up the roof. As the year's pass and the roof ages, the weak point of this roofing system, is when a shake splits on top of a key-way below and exposes the felt. The UV rays from the sun will burn a hole through the felt in about seven years when exposed. Since the felt is only double 8 inches the weakest point is that 2 inches of exposed felt right below the butt of the course above. That also happens to be the thinnest part of the shake.
Using 22 inches felt provides 12-inch head-lap, 2 of that being up under the second course up the roof. Using 22 inch felt adds life to a shake roof. In simple words, using 22 inch felt, your roof is double felted with 30 pounds felt and that stops the leaks that occur when the sun burns a hole in the top layer when exposed. It costs a little more but worth the expense.
3 - I also think it is better to paint all the flashings and valley prior to installation. This ensures good protection of the metal that is covered by the shakes and cannot be painted after the roof is installed. In states where a fire-retardant has been in bed into the shakes. This protects the metal from the corrosive treatment that may precipitate from the shakes. It is a good idea and does not cost much more in paint and time but is a better roof if done.
I know the contractor that will be doing this roof and they are very skilled installers using cedar. These three tips will help increase the life of your new shake roof and will not upset the roofing budget too much.
Have a question? AskARoofer.
Find your local roofing contractor in the RoofersCoffeeShop® Contractor Directory.







Comments
Leave a Reply
Have an account? Login to leave a comment!
Sign In